Feeds:
Posts
Comments

We are so lucky to have a great year-round market here in Charlotte that features local farmers, specialty food and craft vendors. I try to make it to the Atherton Mill Market a couple of times a month during the winter to pick up fresh eggs, local cheeses and whatever winter produce looks good.

My produce purchases have featured a lot of greens, sweet potatoes and various winter squash. I love all of these foods but I’m guilty of sticking to the same preparation methods due to ease and lack of time. I actually had some downtime last night to spend in the kitchen so I started researching recipes that used the ingredients I had on hand and found an amazing sounding vegetarian curry on Smitten Kitchen.

Deb’s recipe was for Curried Lentils and Sweet Potatoes with Swiss Chard. I used her recipe as a guide but made quite a few changes based on what I had on hand in the kitchen. I used collards instead of swiss chard but I think any winter green would work well in this dish. I also omitted some ingredients that I didn’t have and substituted others. The resulting dish was still incredible and I couldn’t get over how well all of the flavors came together. I am a big fan of curry and I loved this vegetarian combo that was protein-packed thanks to the lentils.

I served the curry over brown rice and topped it with plain Greek yogurt and a sprinkle of almonds. The Greek yogurt was a nice touch to cool it down a bit (I was a little heavy handed with the cayenne pepper – I love spice!). I can only imagine that the leftovers will be even better after the flavors have a chance to develop even more with time.

Curried Lentils and Sweet Potatoes with Greens
(Recipe adapted from Smitten Kitchen, original source The New York Times)

Ingredients:

1 tablespoon olive oil
1/2 medium onion, diced
1 large garlic clove, minced
1/2 teaspoon ground ginger (or 1 tablespoon fresh ginger, peeled and grated – I love fresh ginger but didn’t have any)
3/4 teaspoons garam masala
3/4 teaspoons curry powder
1/4 teaspoon cayenne pepper
2 to 3 cups vegetable broth as needed
1 sweet potato, cut into 1/2 inch cubes
3/4 cup dried lentils (I used green)
1 bay leaf
1/2 pound greens such as swiss chard, collards, kale, etc., center ribs removed and leaves thinly sliced (I used about 7 big leaves)
1/2 teaspoon kosher salt, or more to taste
Zest of 1/2 lime
1 tablespoon lime juice
Plain Greek yogurt and sliced almonds for topping, if desired

Directions:

Heat oil in a large saucepan over medium heat. Add onion and cook until soft and translucent, about 5-7 minutes. Add the garlic, ginger, gramam masala, curry powder and cayenne and sauté, stirring constantly, for about one minute. Will be very fragrant.

Stir in 2 cups of broth, sweet potatoes, lentils and bay leaf. Increase to high heat and bring mixture to a boil. Once boiling, reduce heat to medium and partially cover (leave the lid ajar). Simmer for 25 minutes. (If lentils soak up all the broth, add up to 1 more cup of stock, slowly, as needed.) Stir in greens and salt and continue cooking until lentils and greens are tender. Start checking after about 25 minutes. It can take up to 45 depending on your greens and lentils.

Just before serving, stir in lime zest and juice. Serve over desired base – rice, quinoa, etc. or on its own. Top with garnishes of your choice.

Yield: 2-3 main course servings

Healthier Banana Pumpkin Bread

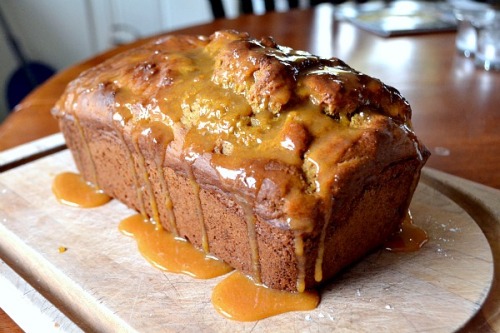
I really enjoy baking quick breads and muffins to freeze in individual servings for a quick breakfast or snack option. Last week I found myself with a past its prime banana and a little bit of leftover canned pumpkin puree so I thought I would combine the two to make banana pumpkin bread.

Since I typically end up eating this kind of thing for breakfast, I wanted to put a healthier spin on the bread. Since bananas provide so much natural sweetness I was able to reduce the amount of sugar that I used. I also subbed half of the flour for whole wheat and used plain Greek yogurt in place of some of the oil. Easy swaps that make a difference in the overall nutrition stats. I did still top it with a pumpkin glaze but it was worth it!

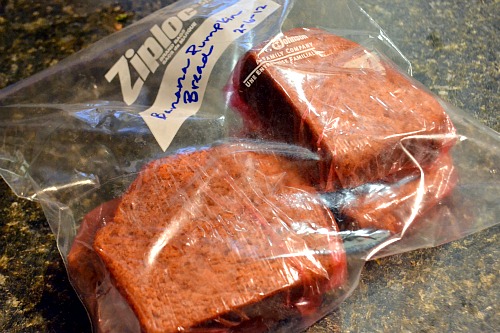
The bread was very easy to put together and didn’t even require the use of a mixer. I think I had it in the oven in under 15 minutes. Once it cooled I topped it with the glaze and then let the glaze set. I then sliced the bread into individual slices that I wrapped in saran wrap and placed in a gallon bag. I placed the bag in the freezer so I can grab a slice whenever I need a quick breakfast.

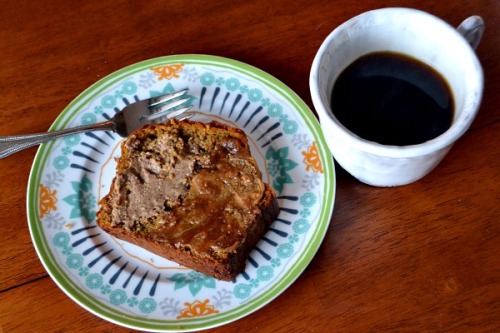
All it needs is a quick 30 seconds in the microwave. Sometimes I like to pop the slice into the toaster for a minute or so too for texture. It’s extra delicious topped with butter, jam or nut butter!

Healthier Banana Pumpkin Bread
(Recipe adapted from Nancy Creative)

Ingredients:

FOR THE BREAD
1 cup all-purpose flour
1 cup whole wheat flour
1 teaspoon baking powder
1 teaspoon baking soda
2 teaspoons pumpkin pie spice (or go up to a tablespoon if you really want it spiced)
1/2 teaspoon salt
1 very ripe medium banana, mashed with a fork
1/2 cup pumpkin puree
1/2 cup light brown sugar
1/2 cup plain nonfat Greek yogurt
2 eggs
1/4 cup canola oil
1 teaspoon vanilla

FOR THE GLAZE
1/2 cup powdered sugar, sifted
1 tablespoon milk
1 tablespoon pumpkin puree

Directions:  

Preheat oven to 350 degrees. Spray a 9 x 5 loaf pan with cooking spray and set aside.

In medium bowl, whisk together flour, baking powder, baking soda, pumpkin pie spice and salt.

In large bowl, mix together pumpkin, banana, yogurt, oil, eggs and brown sugar. Add in half of the flour mixture and mix well before adding in the other half. Continue to stir gently until everything is well combined.

Pour batter into prepared loaf pan and bake for 50-55 minutes, or until toothpick inserted in center comes out clean. Let the bread cool for about 10-15 minutes in the pan before removing it to cool completely on a wire wrack.

For the glaze, whisk together powdered sugar, milk and pumpkin and spoon over loaf once cool.

Yield: 8 servings

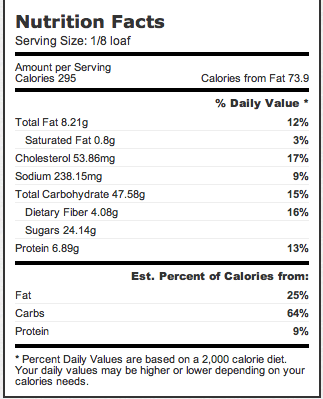
And here are the nutrition details…

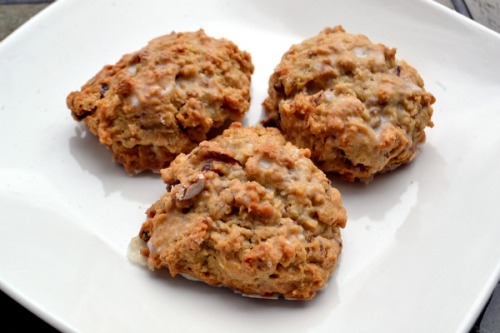
Oatmeal Maple Scones

I have been on a baking kick lately. In the past couple of weeks I’ve baked these oatmeal maple scones twice, a hummingbird cake, peanut butter chocolate chip bars, pita bread and no-bake chocolate peanut butter oat cookies. The time in the kitchen has been relaxing and let’s face it…my sweet tooth is pretty out of control.

When I’m in the mood for something sweet and to bake my go-to is usually cookies or brownies. I wanted to branch out a bit so I flipped through a cookbook that was given to me as a gift a few months ago, Flour. It’s full of amazing recipes from Boston’s Flour Bakery and Cafe. I haven’t made scones in forever and had all the ingredients on hand for their oatmeal maple scones.

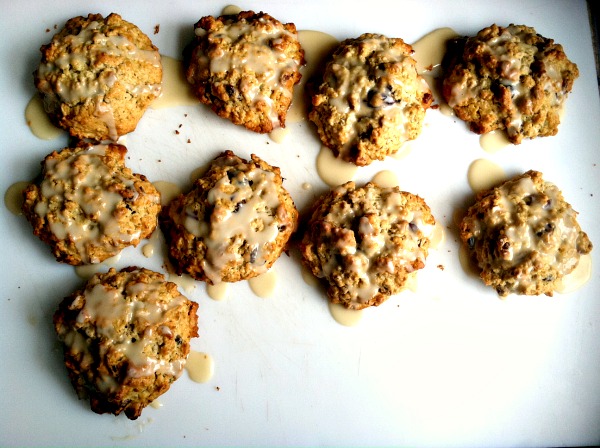
I expected the scones to be good but they were literally one of the best things that I have ever baked. So good that I had to make them again for my grandmother when I went to visit her the next week. I love anything that is oatmeal based and the texture of these scones is perfect. The edges are slightly crunchy but the centers are soft and the toasted pecans and golden raisins add a contrast. The scones are sweetened with maple syrup and include a maple glaze that is a great final touch.

The scones will keep at room temperature in an air tight container for a few days and they also freeze well. They might not seem too exciting but I promise you won’t regret making them for a breakfast (or anytime) treat!

Oatmeal Maple Scones
(Recipe source Flour)

Ingredients:

FOR THE SCONES
1 1/2 cups all-purpose flour
1 1/4 cup old-fashioned rolled oats (not quick)
1 1/2 teaspoons baking powder
1/4 teaspoon baking soda
1/4 teaspoon kosher salt
1/2 cup pecan halves, toasted and chopped
1/2 cup golden raisins or dried cranberries/cherries/etc
1/2 cup (1 stick) cold unsalted butter, cut into 10 pieces
1/3 cup heavy cream (or half and half)
1/2 cup maple syrup
1 teaspoon vanilla
1 cold egg

FOR THE GLAZE
1 cup powdered sugar, sifted
3 tablespoons maple syrup
1-2 tablespoons water

Directions: 

 Preheat oven to 350 degrees.

Using a stand mixer with the paddle attachment (or a hand mixer), combine flour, oats, baking powder, baking soda, salt, pecans and raisins on low speed until combined well. Add butter pieces and beat on low speed for about 30 seconds or until butter is broken down but with pebble sized pieces still visible.

In a separate small bowl, whisk cream, maple syrup, vanilla and egg together. With mixer still on low speed, add wet ingredients to dry mixture and beat for about 30 seconds until just combined.

Remove bowl from mixer and scrape down sides to make sure that all dry ingredients have been incorporated. Using a 1/4 or 1/3 cup measuring cup, drop rounded scoops of dough onto a baking sheet 2 to 3 inches apart. You should have 9 scones.

Bake for 30-40 minutes, or until tops are golden brown. Start checking at the 30 minute mark. Transfer to a wire rack to cool for about half and hour.

Make the glaze while the scones are cooling. Whisk together sifted powdered sugar, maple syrup and water. Once the scones have cooled, brush tops with glaze.

If you keep the scones for more than one day or freeze them, they can be “refreshed” by heating in a 300 degree oven for about 5 minutes.

Yield: 9 scones

Over the last few years I have gotten into the habit of making a pot of vegetarian chili for myself when I’m making traditional chili for Brandon. It’s not that I don’t enjoy beef-based chili but I try to be mindful of my meat intake and chili is a meal where I don’t miss it at all. I also find it extremely easy to make two separate batches because the base exactly the same, I just added the butternut squash in place of ground beef in my veggie variation.

I think I have finally perfected my chili recipe. This is my go-to and it always turns out delicious. I’m not much of a leftover fan but I’ve had this for dinner three times this week and I’m still craving more. It also freezes well for an easy dinner later down the road. This veggie chili is healthy and very satisfying. I like to top mine with cheese, plain Greek yogurt and sliced avocado along with a warm slice of cornbread or cheesy beer bread on the side!

Vegetarian Butternut Squash and Bean Chili
(A Bakin’ and Eggs Original)

Ingredients:

1 tablespoon olive oil
1 large onion, diced
1 green pepper, diced
1 jalapeno pepper, diced
2 cloves garlic, crushed and minced
2-3 tablespoons chili powder (to taste)
1 teaspoon cumin
1/2 teaspoon cayenne pepper
1 teaspoon kosher salt (or more to taste)
2 cups uncooked butternut squash, peeled and cubed (1-inch cubes)
1 (28-ounce) can petite diced tomatoes
1 (15-ounce) can black beans, drained and rinsed
1 (15-ounce) can dark red kidney beans, drained and rinsed
1 (15-ounce) can filled 3/4 with water
1 tablespoon cocoa powder

Directions:

Heat olive oil in a large pot over medium heat. Sauté onions, peppers and jalapeño until mixture become soft. Add garlic and sauté for another minute or two. Add spices and continue to sauté for another minute. Add squash, tomatoes, beans and water and bring to a simmer. I usually simmer covered on low heat for 60-90 minutes and then uncovered on low heat for 30-60, depending on how much time I have and how thick I want my chili. The longer you simmer it uncovered, the thicker it will get. Add the cocoa powder in 10-15 minutes before serving and stir well.

Yield: 8 servings

Pumpkin Oatmeal Cookies Two Ways

I had some downtime last Wednesday afternoon and decided to bake cookies for my evening yoga class. Well, and let’s be honest…for my own personal enjoyment too! I tend to always use the same cookie recipes and wanted to try something new with a fall twist. I found a recipe for pumpkin oatmeal cookies that sounded perfect. I decided to divide the batter in half and mix chocolate chips into one batch and white chocolate chips and dried cranberries into the other.

The cookies were a huge hit with my yogis and I cannot even count how many I have eaten over the past few days. Addictive. The texture is definitely more on the soft side and the cookies have to bake a little longer than normal. I am a fan of soft cookies anyway and I think the texture totally fits with the pumpkin flavor. The cookie dough includes a heavy dose of pumpkin pie spice that really give these their fall flavor. These cookies will become a seasonal favorite in our house!

Pumpkin Oatmeal Cookies
(Recipe heavily adapted from Annie’s Eats)

Ingredients: 

2 cups all-purpose flour
1 teaspoon baking soda
1/2 teaspoon cinnamon
2 teaspoons pumpkin pie spice
1/2 teaspoon kosher salt
1 cup (2 sticks) unsalted butter, softened
1 cup light brown sugar, packed
1 cup granulated sugar
1 large egg
1 teaspoon vanilla extract
1 cup pumpkin puree
1 1/2  cups old-fashioned oats
1 cup semi-sweet chocolate chips
1/2 cup dried cranberries
1/2 cup white chocolate chips

Directions: 

Preheat oven to 350 degrees. Line baking sheets with parchment paper.

In a medium bowl, whisk together flour, baking soda, cinnamon, pumpkin pie spice, and salt.

In the bowl of a stand mixer, fitted with the paddle attachment (or in a large bowl with a handheld mixer), beat butter and sugar on medium-high speed until lightened in color and fluffy, 3 minutes. Add in eggs and vanilla and mix well. Add in pumpkin puree and mix until combined. Reduce mixer speed to low and add in dry ingredients. Finally, add in oats until just combined.

Divide batter in two and add chocolate chips into one half and white chocolate and cranberries into the other.

Using a spoon, drop about 2 tablespoon rounds onto prepared baking sheets, about 2-3 inches apart. Bake 12-14 minutes or until slightly browned. You may need to rotate the baking sheets halfway through depending on the temperature of your oven. Allow to cool before transferring to a wire rack.

Yield: around 4 dozen


One of my favorite things that my grandmother cooked when I was growing up was meatloaf. It was a traditional beef-based meatloaf. She topped it with mushrooms and I loved to dip it in ketchup. Yep, it’s the most simple meals that stand out in my mind.

I don’t make meatloaf often but when I do it’s usually a variation that is far from what I used to eat at my grandmother’s table. I first made this chicken meatloaf stuffed with spinach and cheese a few years ago after spotting it on Pennies on a Platter. I’ve made a few changes to the original recipe and I think they’re worthy of sharing with you.

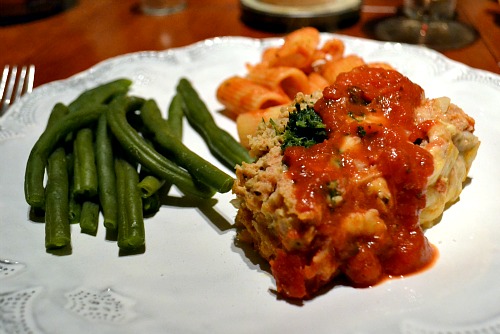
What I enjoy most about this dish is that the individual elements come together for a delicious flavor combination. The chicken mixture is flavored with herbs and garlic and then stuffed with cheese and spinach and topped with marinara sauce and cheese. It makes for a great spin on Italian night. I usually serve it with an extra drizzle or marinara, pasta and a green vegetable or salad. The leftovers reheat wonderfully.


Mozzarella and Spinach Stuffed Chicken Meatloaf
(Recipe adapted from Pennies on a Platter)

Ingredients:
1 pound ground chicken
1 cup marinara sauce, divided
1/2 cup bread crumbs
1 teaspoon Italian seasoning
1 tablespoon fresh parsley, diced
1/2 large onion, finely diced
2 garlic cloves, smashed and minced
2 eggs, lightly beaten
1/4 cup grated parmesan cheese
1/2 teaspoon fennel seed, crushed (optional)
1 (10 ounce) package frozen chopped spinach, thawed and drained (squeeze all the water out)
1 1/2 cups shredded mozzarella cheese, divided

Directions:

Preheat oven to 350 degrees. Line a 9-inch loaf pan with foil, shiny side down.

In a large bowl, combine chicken, 1/4 cup marinara sauce, bread crumbs, herbs, fennel, garlic, onion, eggs and parmesan cheese and mix well.

Press half of chicken mixture into loaf pan, creating a one-inch indentation down the center. Leave one-inch thickness on all sides. Mix together spinach and 3/4 cup mozzarella cheese and spoon into the indentation. Cover with remaining chicken mixture and seal edges.

Top with remaining 3/4 cup marinara sauce and 3/4 cup cheese and bake for 50-60 minutes, or until internal temperature reaches 160 degrees. Let stand for 10 minutes and then lift out of loaf pan using foil edges. Slice and serve with additional marinara sauce, if desired.

Yield: 6-8 servings

We’re trying to take advantage of the last few weeks of daylight savings time and mild temperatures by using the grill whenever possible for dinner. While Brandon is a year-round griller, it’s just more enjoyable to be out there in daylight and not shivering!

We’re always looking for ways to mix it up on the grill so we’re not always preparing the same grilled chicken, fish, steak, veggies, etc. Luckily, we have some great resources for inspiration and while flipping through The Cook’s Illustrated Guide to Grilling and Barbecue, I came across this recipe for Tandoori-Style Chicken Breasts. I really enjoy ethnic foods and I was especially excited for the opportunity to use the turmeric and coriander that are usually pushed to the back of the spice cabinet.

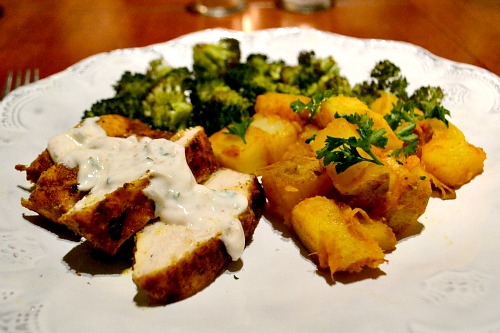
This chicken features a thick coating of a very flavorful spice rub. The tandoori effect is achieved by getting the grill really hot and starting the chicken on high heat before moving it to a cooler side of the grill. The yogurt sauce is the perfect finish and a nice contrast to the chicken. I served the chicken with Indian-Style Potatoes from Epicurious and roasted broccoli.

Tandoori-Style Grilled Chicken Breasts with Yogurt Sauce
(Recipe adapted from The Cook’s Illustrated Guide to Grilling and Barbecue)

Ingredients:

FOR THE YOGURT SAUCE
1 cup plain, nonfat Greek yogurt
2 tablespoons chopped fresh cilantro or parsley (if you’re a cilantro hater like my husband!)
1 garlic clove, minced (I briefly sauteed ours before adding it because I cannot do raw garlic)
Salt and cayenne pepper, to taste

FOR THE CHICKEN
1 teaspoon fresh ginger, peeled and minced
1 tablespoon ground coriander
1 1/2 teaspoons ground cumin
1 teaspoon ground turmeric
1/2 teaspoon ground cinnamon
Olive oil
4 boneless, skinless chicken breasts

Directions:

FOR THE YOGURT SAUCE
Whisk together all ingredients and season to taste with salt and cayenne. Place in fridge until ready to serve.

FOR THE CHICKEN
Prepare grill. If using gas, preheat by turning all burners to high and closing lid.

Mix together ginger, coriander, cumin, turmeric, cinnamon, 1/2 teaspoon of salt and 1/4 teaspoon of cayenne together in a small bowl. Rub chicken breasts with olive oil and then generously coat with spice mixture.

If using gas grill, leave one burner on high and turn others to medium low. Place chicken on hot part of the grill until well-browned, 2-3 minutes with the lid down. Move to the cooler side of the grill and continue to cook for another 10 mninutes. Turn and cook for 5 more minutes or until done. Internal temperature should read 160 degrees.

Note that we cooked this on the Big Green Egg and used a similar technique to the above by moving chicken to a cooler part of the grill after the first few minutes and cooking with lid down.

Let chicken rest for 5 minutes and then slice. Serve with yogurt sauce.

Yield: 4 servings

There are a few foods that are dinner staples in our house. We can’t seem to go a week or two without having them. Pizza, pasta and Mexican are three of the things you’ll find us eating frequently. (And coincidentally all feature carbs and/or cheese!)

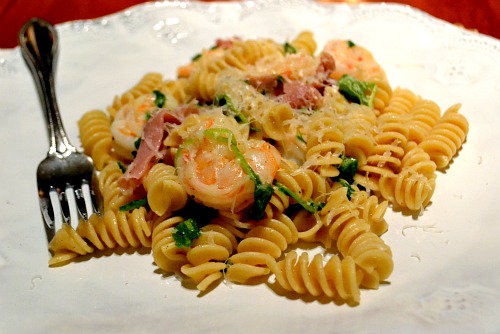
We decided on pasta last night but wanted to try a new recipe. Typing “pasta” into the search box on Epicurious yields overwhelming results so in order to focus us a bit more, I gave Brandon The Gourmet Cookbook to browse through. He came up with a Penne with Arugula and Prosciutto that sounded great and featured a 20 minute start to finish time. This was perfect since we weren’t able to start on dinner until after 8 p.m.

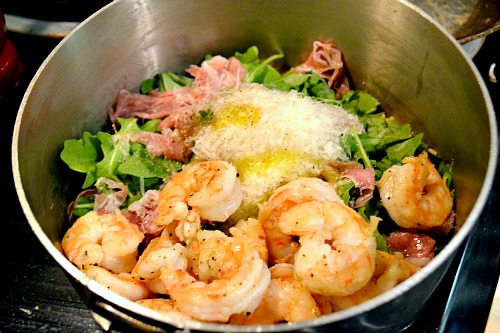
We made a few modifications to the original recipe. The biggest was the addition of shrimp which we both agreed really took the dish up a notch. Overall, this is a very simple recipe but each element plays a big part in the flavor, especially the arugula. Don’t skip it.

While the pasta was boiling, I sauteed the shrimp in olive oil with a little bit of a lemon pepper rub (Dizzy Pig Shakin’ the Tree). Once the pasta and shrimp were done, I drained the pasta and dumped all the ingredients into the pot with the pasta. After a stir and a generous crank of salt and pepper it was time to eat.

I served this  dish with a hunk of bread and olive oil dipping sauce. At one point I said, “Mmm…I love carbs.” aloud. We’re happy to have another pasta dish worth repeating (over and over again) in our repertoire!

Pasta with Shrimp, Arugula and Prosciutto
(Recipe adapted from The Gourmet Cookbook)

Ingredients:

1/2 pound pasta (half box) pasta, penne, corkscrew, etc.
1/2 pound shrimp, peeled and deveined
Seasoning of your choice for the shrimp (salt and pepper, lemon pepper, etc)
1/4 pound thinly sliced proscuitto, chopped
3/4 to 1 pound arugula, stems removed, chopped roughly (I used about 1/2 of a clamshell container)
1/2 cup finely grated parmigiano-reggiano
3/4 teaspoon grated lemon zest
1 quarter lemon, squeezed
2-3 tablespoons olive oil
Salt and pepper, to taste

Directions:

Cook pasta in a large pot of boiling salted water according to package directions. Reserve 1/2 cup cooking water and drain pasta.

While pasta is cooking, sautee shrimp over medium high heat with olive oil and seasoning of your choice. This should take about 3-4 minutes, total.

Return pasta to pot and toss with prosciutto, shrimp, arugula, cheese, lemon zest, lemon juice and salt and pepper to taste. Add some of the pasta water if it seems dry.

Yield: 2-3 servings

Spiced Peach-Carrot Bread

I have been getting so much inspiration from Southern Living this summer. I’m not sure if maybe they’ve had a change in their food department or have just been focusing more on improving/freshening their food features but the recipes they have been publishing have been wonderful! I have a long list of things that I’d like to try from recent issues.

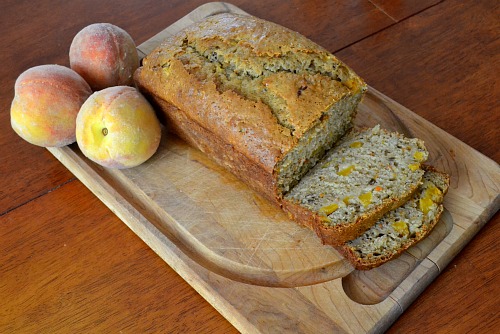
This Spiced Peach Carrot Bread was a “must make ASAP” and given the constant presence of peaches on my counter during the late summer months, I had all the ingredients on hand. I really enjoy quick breads and loved the idea of peach and carrot bread in lieu of the usual banana base.

I made some modifications to the original recipe. I doubled the spices, replaced some of the oil with Greek yogurt and added vanilla extract. The bread turned out beautifully and it’s so easy to prepare. You only need one bowl and no mixer! It was great on its own and it was especially tasty topped with almond butter for breakfast. This will definitely become a yearly summer staple.

Enjoy the last of the summer peaches (before we are bombarded with all things pumpkin and winter squash!) and make this recipe.

Spiced Peach Carrot Bread
(Recipe adapted from Southern Living – July 2011)

Ingredients:

3/4 cup chopped pecans
2 1/2 cups all-purpose flour
1 cup sugar
2 teaspoons ground cinnamon
1/2 teaspoon ground nutmeg
3/4 teaspoon baking soda
1/2 teaspoon baking powder
1/2 teaspoon salt
1 1/2 cups peeled and chopped fresh peaches
3/4 cup grated carrots
1/3 cup vegetable oil
1/3 cup plain nonfat Greek yogurt
1/2 cup milk
2 large eggs, lightly beaten
1 teaspoon vanilla

Directions:

Preheat oven to 350 degrees and prepare a 9 x 5 loaf pan with cooking spray.

Toast pecans either in the oven in a shallow pan for 8-10 minutes or on the stove top in a pan over medium heat. Stir occasionally. When they are fragrant and slightly darkened in color, they are ready. Allow to cool.

Stir together flour, sugar, cinnamon, nutmeg, baking soda, baking powder, and salt in a large bowl. Add the peaches, carrots, oil, yogurt, milk, eggs, vanilla and pecans and stir until just moistened and combined.

Pour batter into prepared baking dish and bake for about 1 hour and 10 minutes or until a toothpick inserted in the center comes out clean. Cool in pan for 5 minutes before removing and placing on a wire rack to completely cool.

Yield: 1 loaf

Long time, no post, huh? I know I keep saying this but if you can just hang with me a little longer I promise that I will be back to posting 3-4 recipes a week. Promise.

Now, the occasion for this post…I’m participating in my very first virtual baby shower! A group of food bloggers are celebrating the upcoming arrival of Josie’s baby boy! I couldn’t be more excited for her. If you’ve been reading my blog for a while you know how much I love Josie and her blog, Pink Parsley. We’ve never met in person but for some reason I just know that we would be such good friends if we were close to each other. Josie  lives in the Atlanta area so I’m hoping we can finally meet sometime very soon when I’m down there visiting my parents.

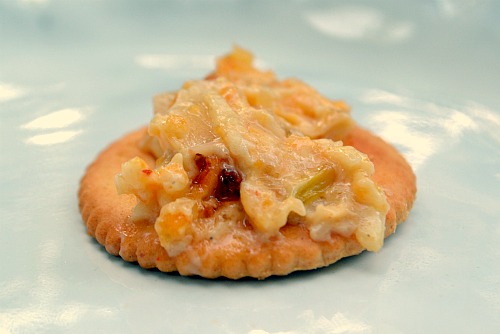
Since I’m a fellow Georgia girl, I wanted to make a Southern-themed recipe for the virtual shower. I actually grew up about 45 minutes from Vidalia, Georgia so when I spotted this Baked Vidalia Onion Dip in my Southern Living Cookbook, I knew it was the perfect thing! You can’t have a party without a dip, right?

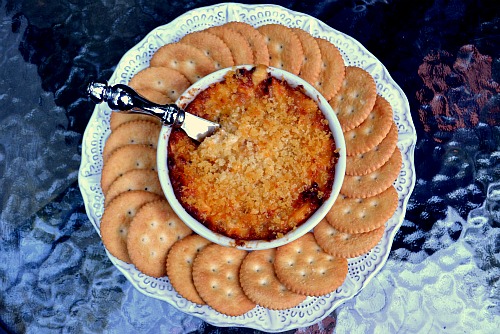
The dip was so easy to assemble and I know it would be a crowd-pleaser at any get together (especially with football season coming up!). Since you sautee the onions first, it really tones down the onion bite and really brings out the sweetness in  them.

The original recipe did not call for a breadcrumb topping but I thought it would be a nice addition. We enjoyed the dip with crackers but you could also try tortilla chips. Play around with the cheese mixture – I used a combination of cheddar and an Italian blend but I think it would be especially delicious with pepper jack or Swiss.

Big thanks to Annie for organizing the virtual baby shower! Please check out her blog to see all of the amazing things that everyone contributed!

Baked Vidalia Onion Dip
(Recipe adapted from The Southern Living Cookbook)

Ingredients:

2 tablespoons butter
3 Vidalia onions, diced
2 cups cheese (cheddar, swiss, jack, a mixture, etc)
1 cup mayonnaise (light is okay)
1 garlic clove, minced
1/2 teaspoon hot sauce
Dash cayenne pepper, optional for a little added heat
Salt and pepper, to taste
1/2 cup panko tossed with 1 tablespoon melted butter (for topping, optional)

Directions:

Preheat oven to 375 degrees. Prepare a two-quart baking dish with cooking spray.

Heat a large skillet over medium heat. Add butter and melt. Add onions and cook until softened and beginning to brown, about 5-7 minutes. Add garlic and cook for another minute.

In a separate bowl, stir together sauteed onions and garlic and rest of ingredients. Top with panko/melted butter mixture, if desired. Bake for 25 minutes and let stand 10 minutes before serving.